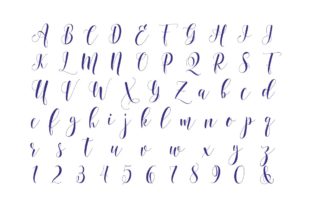
Cross Stitch Alphabet: A Practical Guide to a Timeless Design Pattern
Cross stitch alphabets have been a cornerstone of needlework for generations, offering structure and personalization to fabric projects. The specific Cross Stitch Alphabet pattern described here—featuring capital letters approximately 52 stitches tall, translating to roughly 3.3–4 inches (9.4 cm) on 14-count fabric—is a versatile, large-scale design suited for name samplers, monograms, banners, and signage. Unlike many small-scale alphabets that require magnifiers and intense focus, this bold size allows for visible impact and practical readability from a distance. Understanding how to integrate this pattern into your workflow—whether you stitch for relaxation, gifts, or commercial orders—turns a simple PDF into a reusable asset for years of projects.
Where Cross Stitch Alphabet Fits in Your Broader Process
Every stitcher, from hobbyist to small business owner, follows a project lifecycle: ideation, pattern selection, material gathering, execution, finishing. The Cross Stitch Alphabet sits squarely in the pattern selection and customization phase. Rather than searching for individual letter patterns or trying to generate consistent characters manually, you open this PDF and have the full set of capital letters ready. This drastically reduces planning time and eliminates the guesswork of letter spacing and alignment. For those who produce custom pieces—monogrammed towels, personalized birth announcements, shop banners—this alphabet becomes a core template that interacts with every new project brief. Instead of reinventing the letterforms each time, you simply select the needed characters, adjust thread colors, or scale the fabric count to match the recipient’s preference.
Before the Project: Planning and Preparation
Before you stitch, you evaluate the final use case. A 3.3–4 inch letter height on 14-count fabric is substantial—ideal for wall hangings, pillows, or signs where text must be legible across a room. In your preparation workflow, measure the available fabric area and decide how many letters you need. For a name with 6 letters, you’ll need at least 24 inches of horizontal space (since each capital is roughly 52 stitches wide plus 4–6 stitches for spacing). Prepare accordingly with aida or evenweave fabric, a hoop or frame, and the correct needle size for 14-count. Because the pattern comes as a PDF, you can print it, enlarge sections if necessary, or mark up a copy with your chosen floss colors. This upfront organization prevents mid-project frustration and wasted material.
During the Project: Execution and Consistency
When stitching, the alphabet pattern helps maintain consistency across letters. Each capital follows the same structural height and baseline, so when you jump from an 'A' to a 'W', the visual weight and alignment stay uniform. This is critical in multi-word phrases or when stitching rows of text. The PDF format allows you to check off characters as you complete them, track progress, and note any modifications. For efficiency, group letters with similar stitch patterns—like 'B', 'P', 'R'—and stitch them consecutively to minimize thread color changes. The 52-stitch height also means you can use a parking method or count stitches in blocks rather than individual squares, reducing recounting errors. If you use a digital device, load the PDF on a tablet and zoom in; if you prefer paper, print a clean copy and slip it into a page protector for durability.
After the Project: Finishing and Long-Term Use
Once the stitching is complete, the real value of a well-designed alphabet pattern emerges. You can reuse it for other projects: stitch the same letters in different thread colors, combine them with border patterns from other sources, or use only a subset of characters for monograms. The PDF file remains part of your digital pattern library. For small business owners, this means you can offer customized products without creating new patterns each time. For personal stitchers, it means a cohesive look across multiple gifts—each baby blanket uses the same alphabet, creating a family set. Over time, you may even modify the pattern by omitting serifs or adjusting stroke widths, then store the edited version for future use.
Practical Implementation Tips for Different Use Cases
The Cross Stitch Alphabet pattern works across many contexts. Below are specific workflow scenarios that illustrate how to integrate it smoothly.
Creating Personalized Gifts
Suppose you want to stitch a wedding sampler. You’ll combine the couple’s names, the date, and a decorative motif. With this alphabet, you can lay out the text in a central column or an arc. Because the letters are large, you might only need the initials or first names. Calculate the stitch count for the text block, then design the surrounding elements. Use a gridding pen to mark the center of your fabric, then start stitching from that reference point. The PDF allows you to check letter shapes without flipping through multiple pages—a single sheet holds all capitals, so you can quickly verify that the 'M' and 'W' have the correct proportions. To ensure symmetry, consider stitching mirrored letters or left-leaning characters first.
Business Use: Signs and Banners
Small businesses often need stitched signage for trade shows, Etsy listings, or farmhouse-style décor. The 52-stitch height gives you a bold, readable product. To scale the pattern for larger formats, increase fabric count: on 11-count aida, the letters become roughly 4.7 inches tall; on 18-count, they shrink to about 2.9 inches. The PDF pattern remains the same; you simply adjust the fabric count and thread coverage. For multiple sign orders, create a master grid of letters and reuse it for each project. Keep a log of thread colors and fabric types used for each letter combination to speed production. Rotate the PDF in digital editing software to test different layouts before stitching.
Educational and Learning Workflows
For teachers and educators introducing cross stitch to beginners, this alphabet serves as a structured learning tool. Learners can practice consistent tension by stitching a series of letters, focusing on the straight lines and curves of each capital. The uniform height helps students compare their progress across characters. The PDF can be printed on graph paper or projected onto a whiteboard for group instruction. Mark the center lines and highlight the baseline so learners understand the geometry of letterforms. As students gain confidence, they can move on to stitching words and phrases, building muscle memory with each project.
Preparation and Organization
Before starting any project with this alphabet, prepare your workspace. Print the PDF and highlight the exact letters you need. If you plan to reuse specific letter combinations frequently (e.g., an ‘E’ or ‘S’), make a separate copy or laminate the page. For digital stitching apps, import the PDF and trace the letters into your project file if the app supports image overlays. When using multiple colors per letter, mark each section on the printout with a colored pencil—this prevents confusion between stitch symbols.
Compatibility with Other Resources
The alphabet pattern is most effective when paired with a clear gridding method. Use a water-soluble pen or thread to mark your fabric in 10x10 grids. Then align each letter’s center with your grid marks. Because the PDF doesn’t include margins, you are responsible for centering the text on fabric. Combine with border patterns from other sources, but always test the spacing first by laying out printed letters on a paper grid. The 14-count fabric acts as your scale: each square is roughly 1.8 mm, so the letters are physically large. If you plan to frame the finished piece, factor in a 3-inch margin on all sides. The pattern’s simplicity (no fractional stitches) makes it compatible with most cross stitch techniques, including full cross, half stitch, and backstitch for outlining.
Efficiency and Quality Control
To maintain consistent stitch quality, use a single brand of floss and the same number of strands throughout the project. For 14-count fabric, two strands of floss give good coverage without bulk. Check your tension every few letters—a too-tight stitch can cause fabric puckering, while too-loose stitches leave gaps. The large letter size makes errors more visible, which is an advantage: you catch mistakes early. Use the PDF as a checklist to confirm each character’s shape matches the pattern. If you stitch multiple letters and later realize one is off, you can frog that letter and restitch without affecting others if you stitch vertically or horizontally in sequence.
Long-Term Use and Archiving
Store the PDF in a cloud folder dedicated to cross stitch resources. Create subfolders for alphabets, borders, and motifs. When you modify the pattern—for instance, by adding serifs or filling in open spaces—save the edited version with a version number. This practice builds a custom library of patterns tailored to your style. Over years, you’ll accumulate a set of alphabets in various sizes, including this 52-stitch version, ready for any text-based project. The PDF format ensures it remains printable and viewable on any device without degradation.
Conclusion
The Cross Stitch Alphabet pattern with 52-stitch tall capitals is more than a single-use chart—it is a foundational tool that supports planning, execution, and reuse across countless projects. Whether you stitch for personal satisfaction, run a custom order business, or teach beginners, this alphabet eliminates guesswork and enhances consistency. By integrating it into your existing workflow—from preparation through finishing—you gain a reliable asset that reduces friction and raises the quality of your finished pieces. Open the PDF, choose your letters, and let the uniform height and clear structure guide your needle.